As you delve into the world of planting and cultivation, you may encounter questions that spark curiosity and intrigue. One such query that often arises among budding gardeners is: Can you plant green potatoes?
Potatoes, with their versatile nature and delicious taste, are a staple in many diets worldwide. Yet, there’s a fascinating aspect to these humble tubers that might surprise you. Picture this: you’re sorting through a batch of potatoes, and you notice a few with a peculiar greenish hue.
Your first instinct might be to discard them, fearing they’re unfit for consumption. But what if I told you that these green potatoes hold a secret that could transform your garden?
The enigmatic allure of green potatoes extends beyond their surface appearance. Beneath that verdant exterior lies a tale of mystery and potential. As you contemplate whether to plant these seemingly unconventional spuds, you may find yourself drawn into a world of experimentation and discovery.
Join me as we embark on a journey to uncover the truth behind green potatoes. Together, we’ll explore the possibilities that await within your garden and unearth the secrets that nature has hidden within these intriguing tubers. So, can you plant green potatoes? The answer may surprise you.
Can You Plant Green Potatoes
Yes, You Plant Green Potatoes, but with caution. Green potatoes contain a substance called solanine, which can be toxic in large amounts. When potatoes are exposed to light, they produce chlorophyll, turning them green and increasing solanine levels.
While small amounts of green on potatoes are generally harmless, it’s crucial to exercise caution. Before planting green potatoes, inspect them thoroughly. If the green portions are small and shallow, you can carefully cut them off, ensuring to remove any green flesh.
Allow the potatoes to cure in a dark, cool place for a couple of weeks before planting. However, if the potatoes are extensively green or have begun to sprout, it’s best not to plant them, as the solanine levels could be too high. Instead, dispose of them properly.
How to Grow Potatoes at Home
Potatoes are one of the most satisfying crops to grow in your home garden. They are versatile, delicious, and relatively easy to cultivate. To get started, the first thing you need to do is choose the right potato variety for your specific growing conditions. Consider factors like your climate, available space, and desired taste preferences when selecting your seed potatoes.
Next, ensure that the soil in your garden is well-prepared for planting. Potatoes thrive in loose, well-draining soil with a slightly acidic pH level. It’s a good idea to enrich the soil with organic matter like compost or aged manure before planting. This will provide essential nutrients for your potato plants to grow strong and healthy. Remember, a little bit of preparation goes a long way in ensuring a successful potato harvest!
Choosing the Right Potato Variety
When it comes to selecting the right potato variety for your home garden, it’s important to consider the general characteristics that best suit your needs. Different potato varieties have varying textures, flavors, and ideal uses, so it’s worth thinking about how you plan to use your potatoes, whether for mashing, roasting, or salads. Some varieties like Russet potatoes are great for baking due to their starchy texture, while Yukon Gold potatoes are known for their creamy texture and are perfect for making mashed potatoes.
Another factor to keep in mind is the length of the growing season in your area. Certain potato varieties are better suited for shorter growing seasons, while others thrive in longer ones. Early varieties like Red Norland can be harvested sooner, making them a great choice if you’re looking for a quicker yield. On the other hand, maincrop varieties such as Kennebec potatoes take longer to mature but can offer a higher yield per plant. Consider your climate and the length of your growing season to select a potato variety that will best thrive in your garden.
Also Check – Can You Plant Tomatoes Near Potatoes
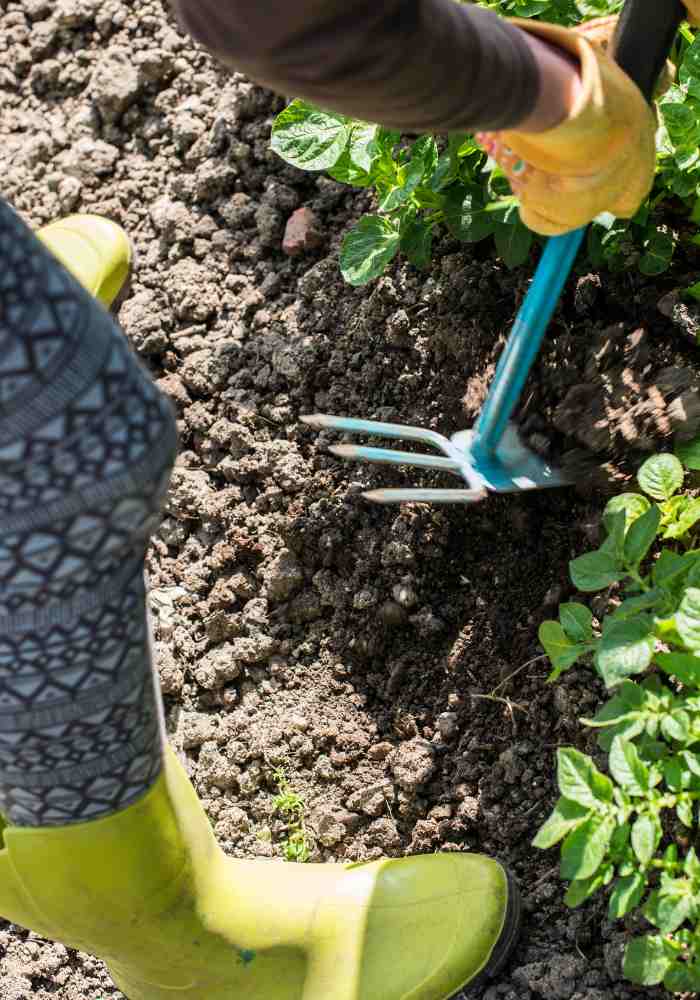
Preparing the Soil for Planting
First things first, before you start planting those potatoes, you’ve got to get your soil prepped and ready. Clear the area of any weeds or debris that might get in the way of your spud-growing adventure. You want your spuds to have all the space they need to stretch out and grow big and strong.
Next up, it’s time to dig in! Break up the soil with a shovel or a garden fork to loosen it up. This will help the potato roots to spread out easily and access all the nutrients in the soil. If your soil is on the clayey side, mix in some compost to improve drainage and aeration. Remember, happy potatoes start with happy soil!
Recommended If you’re seeking a nutrient-rich soil mix for optimal growth, consider this soil option.
Cutting and Curing Seed Potatoes
When preparing to plant your potatoes, it’s important to cut your seed potatoes into pieces. Each piece should have at least one eye or sprout, as this is where the new plants will grow from. Cutting the seed potatoes also helps to increase the number of plants you can grow from each potato, giving you a larger harvest in the end.
After cutting your seed potatoes, it’s essential to let them cure before planting. Curing involves leaving the cut pieces in a cool, dry place for a few days to allow the cut surfaces to heal and form a protective layer. This helps to reduce the risk of rot and disease when you plant them in the soil. Make sure to keep them out of direct sunlight during this process to prevent them from turning green.
Also Read – Can You Plant Different Varieties Of Potatoes Together
Planting Potatoes in the Ground
When planting potatoes in the ground, it’s important to dig trenches that are about 4 inches deep and spaced about 12-15 inches apart. Place the seed potatoes with the cut side down and make sure each piece has at least 2-3 eyes. Cover the potatoes with soil, leaving a small mound on top to allow for hilling later on. Remember to water the newly planted potatoes thoroughly to ensure proper hydration for growth.
As the potato plants begin to emerge, continue to water them regularly, especially during dry spells. Once the plants reach about 6 inches tall, start hilling up the soil around the base of the plants to protect the developing tubers from sunlight. Keep hilling up the soil every few weeks to encourage more potatoes to grow and prevent them from turning green. With proper care and attention, your potato plants will thrive and reward you with a bountiful harvest.
Recommended Check out this heavy-duty raised bed for your garden.
Caring for Potato Plants
Potato plants need some love and attention to thrive in your garden. Make sure to keep an eye on them and remove any weeds that may be competing for nutrients. It’s like giving them their own little spa day, minus the cucumbers on their eyes!
Another important aspect of caring for potato plants is to monitor for any signs of disease or pest infestations. Nobody likes unwanted guests crashing the party, especially when they’re munching on your prized potato crop! Stay vigilant and address any issues promptly to keep your potato plants happy and healthy.
Watering and Fertilizing Potatoes
When it comes to watering your potato plants, consistency is key. Potatoes need about 1-2 inches of water per week, either from rainfall or irrigation. Make sure to water deeply to encourage the roots to grow downwards, but be cautious not to overwater as this can lead to diseases like rot. It’s important to check the moisture levels of the soil regularly by sticking your finger into the ground. If the top few inches feel dry, it’s time to water your potato plants.
In terms of fertilizing, potatoes are heavy feeders and benefit from a balanced fertilizer with a higher potassium content. You can apply fertilizer when planting and then side dress every few weeks throughout the growing season. Avoid fertilizers high in nitrogen as this can promote excessive foliage growth at the expense of potato production. Organic options like compost or well-rotted manure can also be used to amend the soil and provide nutrients to your potato plants. Remember, a well-fed potato plant is a happy potato plant!
Recommended If you’re in search of fertilizer, you can check out this selection.
Hilling Up Potato Plants
When your potato plants reach about 6 to 8 inches tall, it’s time to start hilling them up. Hilling up is the process of mounding soil around the base of the plants to promote more tuber growth and protect the developing potatoes from sunlight, which can turn them green and make them inedible.
To hill up your potato plants, simply use a hoe or shovel to carefully mound soil around the stems, leaving only the top few inches of foliage exposed. Make sure not to cover the leaves completely, as they need sunlight for photosynthesis. Repeat this process every couple of weeks as the plants grow taller, gradually building up the soil around them to create sturdy mounds.
Read More – How To Plant Japanese Sweet Potatoes
Dealing with Pests and Diseases
Pests and diseases can be a real buzzkill when it comes to growing your own potatoes. You might spot some pesky bugs munching on your plants or notice unsightly spots on the leaves – not cool at all. But fear not, there are ways to combat these annoyances without resorting to harsh chemicals that harm the environment.
One natural way to fend off pests is by planting companion plants like marigolds or basil near your potato crop. These aromatic herbs can act as natural repellents, keeping unwanted insects at bay. And if diseases like late blight rear their ugly heads, try spacing out your potato plants more so that air can circulate better, preventing the spread of infection. Remember, a little TLC and some clever strategies can go a long way in keeping your potato patch healthy and thriving.
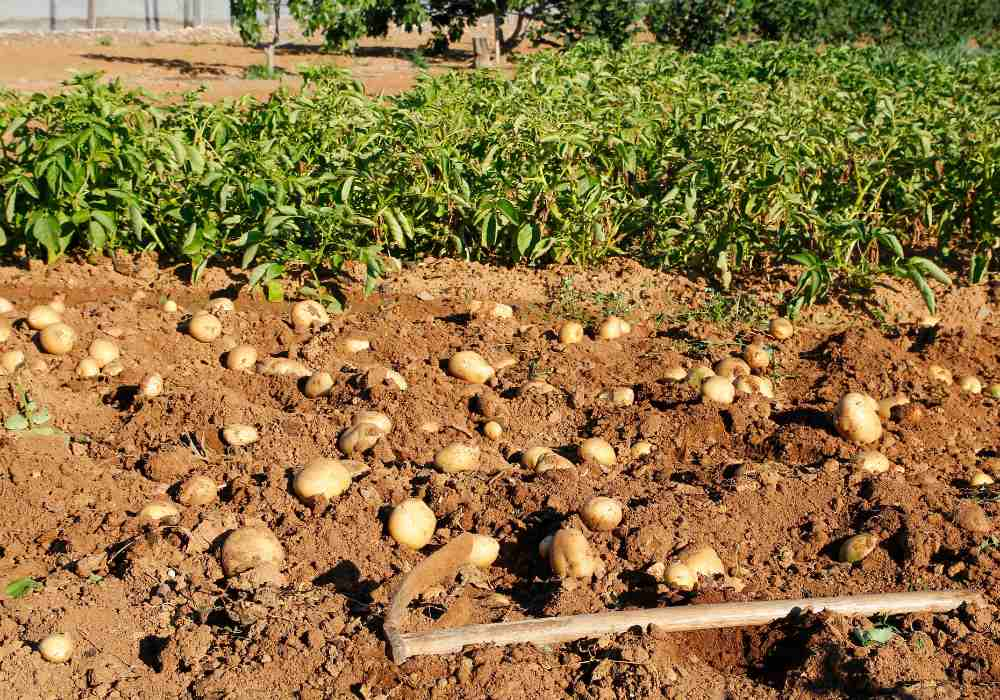
Harvesting Potatoes
Now, it’s finally time to dig up those delicious potatoes you’ve been growing in your backyard! To start harvesting, gently loosen the soil around the base of the plants using a garden fork or shovel. Be careful not to damage the tubers as you unearth them – you want to enjoy your homegrown potatoes, not mash them up in the process!
As you dig, you’ll be delighted to discover the fresh, vibrant potatoes hidden beneath the ground. Brush off any excess dirt and lay them out to dry in a cool, dark place for a few hours. This curing process helps toughen the skin and ensures they store well. After that, they’re ready to be enjoyed in a variety of tasty dishes or stored for future use. Happy harvesting!
Storing Potatoes for Later Use
Now that you’ve harvested your potatoes, it’s time to store them properly to ensure they last as long as possible. The key to storing potatoes for later use is to keep them in a cool, dark, and dry place. Avoid storing them in the refrigerator, as the cold temperature can turn the starches in the potatoes into sugar, affecting their flavor and texture. Instead, opt for a well-ventilated area like a basement or pantry.
Before storing your potatoes, make sure to inspect them for any cuts, bruises, or signs of decay. Remove any damaged potatoes as they can spoil the whole batch. Store your potatoes in a breathable container such as a burlap sack or a paper bag. Be sure to keep them away from onions or garlic, as these produce gases that can cause potatoes to spoil quickly. With proper storage, your homegrown potatoes can last several months, providing you with a delicious and nutritious ingredient for your meals.
Enjoying the Fruits of Your Labor
Now that you’ve successfully grown your own potatoes, it’s time to reap the rewards of your hard work! Harvesting is like a treasure hunt in your own backyard. With gloves on, gently dig into the soil to uncover those beautiful potatoes. It’s so satisfying to see the fruits of your labor come to life as you unearth each potato from the ground.
Once you have harvested your potatoes, it’s essential to store them properly to enjoy them for weeks to come. Find a cool, dark place to store your potatoes, like a cellar or a pantry. Make sure they are well ventilated and not exposed to direct sunlight. With careful storage, you can savor the taste of your fresh, homegrown potatoes long after the harvesting season is over.
How do I choose the right potato variety to grow at home?
A good rule of thumb is to choose a variety that is well-suited to your climate and soil conditions. Some popular options include Yukon Gold, Russet, and Red Norland potatoes.
Can I plant potatoes in containers instead of in the ground?
Yes, you can definitely plant potatoes in containers! Just make sure the container is at least 16 inches deep and has good drainage.
Do I need to fertilize my potato plants?
Yes, it’s a good idea to fertilize your potato plants every few weeks with a balanced fertilizer to help them grow strong and healthy.
How do I know when my potatoes are ready to harvest?
Potatoes are usually ready to harvest when the plants start to die back. You can gently dig around the base of the plant to check for mature potatoes.
How should I store my harvested potatoes for later use?
Store your harvested potatoes in a cool, dark place with good ventilation. Avoid storing them in the refrigerator, as this can cause the potatoes to become sweet and discolored.