
If you’ve ever marveled at the allure of Japanese cuisine, you might have encountered the delightful sweetness of Japanese sweet potatoes. But what if you could grow these delectable tubers right in your own backyard? Welcome to the fascinating world of planting Japanese sweet potatoes.
Picture this: vibrant green leaves unfurling under the warm sun, hiding treasures beneath the soil. With just a few simple steps, you can transform your garden into a haven for these culinary delights.
Embark on a journey where soil meets seed, and patience yields sweet rewards. Discover the secrets of planting Japanese sweet potatoes, where ancient traditions blend seamlessly with modern techniques.
But wait, there’s more to this story than meets the eye. Dive into the intricacies of soil preparation, selecting the perfect spot for your sweet potatoes to thrive. Learn the art of nurturing these underground gems as they grow from tender shoots to bountiful harvests.
Join us as we unveil the mysteries of cultivating Japanese sweet potatoes, from planting to harvesting and everything in between. Get ready to tantalize your taste buds and elevate your gardening game with this Japanese delicacy.
How To Plant Japanese Sweet Potatoes
Planting Japanese sweet potatoes can be a rewarding experience for beginners looking to grow their own delicious tubers. To start, choose a sunny spot in your garden that receives at least 6-8 hours of sunlight per day. Sweet potatoes love warmth and sun, so make sure to select a location that provides these conditions for optimal growth.
Once you’ve picked the perfect spot, it’s time to prepare the soil. Sweet potatoes thrive in well-draining soil rich in organic matter, so amend your garden bed with compost or aged manure. Loosen the soil to a depth of about 12 inches to give the sweet potato roots plenty of room to spread out and develop. With the right location and soil preparation, you’ll be on your way to a successful sweet potato harvest in no time!
Selecting the Right Location for Your Sweet Potato Patch
When choosing where to plant your Japanese sweet potatoes, make sure to find a spot that gets plenty of sunlight throughout the day. Sweet potatoes love the sun, so aim for a location that receives at least 6-8 hours of direct sunlight daily. Avoid shaded areas or spots that are prone to being overshadowed by tall buildings or trees.
Additionally, consider the soil quality of the chosen location. Sweet potatoes thrive in well-draining, loose soil with a slightly acidic pH level around 5.8-6.2. Test the soil in the area you’re eyeing for your sweet potato patch to ensure it meets these criteria. If the soil is not ideal, you can amend it by adding compost or organic matter to improve its texture and fertility for optimal sweet potato growth.
Recommended If you’re seeking a nutrient-rich soil mix for optimal growth, consider this soil option.
Preparing the Soil for Planting
Now that you’ve picked the perfect spot for your sweet potato patch, it’s time to prep the soil for planting. Start by removing any weeds and debris from the area to give your sweet potatoes the best chance at thriving. Break up the soil using a garden fork or tiller to ensure it’s loose and well-aerated, making it easier for the sweet potato roots to grow and expand.
Next, it’s essential to amend the soil with organic matter like compost or well-rotted manure. This will enrich the soil with essential nutrients and improve its overall structure, promoting healthy sweet potato growth. Make sure to mix the organic matter thoroughly into the soil to create a nutrient-rich environment for your sweet potatoes to establish strong roots and develop into robust plants.
Choosing the Best Time to Plant Your Sweet Potatoes
When it comes to planting Japanese sweet potatoes, timing is key. You’ll want to wait until after the last frost in your area before getting those sweet potato slips in the ground. These warm-weather loving plants thrive in temperatures above 50 degrees Fahrenheit, so aim for planting them in late spring or early summer for the best results.
While sweet potatoes can tolerate some cooler temperatures, it’s essential to give them a good head start by waiting until the soil has warmed up before planting. This will help the slips establish themselves quickly and start growing vigorously. Keep an eye on the weather forecast and be patient – your sweet potatoes will thank you for it with a bountiful harvest later in the season.
Also Read– Do Sweet Potato Plants Flower – Sweet Surprises
Selecting Healthy Sweet Potato Slips for Planting
When selecting sweet potato slips for planting, look for ones that are about 6-12 inches long with healthy leaves and roots. Avoid slips that are wilted, discolored, or have visible damage. The slips should be sturdy and not too thin, as this indicates they may not be as robust for planting.
It’s also important to choose slips from reputable sources to ensure they are disease-free and of good quality. Consider buying slips from local nurseries or trusted online suppliers. Remember, healthy slips will give your sweet potatoes a better chance of thriving and producing a bountiful harvest.
Digging Holes and Planting Your Sweet Potato Slips
So, you’ve got your sweet potato slips ready to go, now it’s time to get digging and planting! Choose a spot in your garden that gets plenty of sunlight and has well-draining soil. The ideal spacing between each sweet potato slip is around 12-18 inches to give them room to spread out and grow to their full potential.
When digging the holes for your sweet potato slips, make sure they are deep enough to accommodate the entire length of the slip, with at least a few inches of soil covering the top leaves. Gently place the slips in the holes, making sure not to bend or break them in the process. Once they’re snugly settled in, lightly pat the soil around the base of the slips to secure them in place. Remember to water the newly planted slips thoroughly to help them establish roots in their new home.
Also Read – Can Potato Plants Survive Frost – Chilling Truth
Watering Your Sweet Potatoes Properly
Watering your sweet potatoes properly is essential for their growth and development. These plants thrive in moist soil, so it’s important to keep them adequately hydrated throughout the growing season. Make sure to water your sweet potatoes consistently, but be mindful not to overwater as this can lead to root rot. Checking the soil moisture regularly by sticking your finger into the ground can help you determine when it’s time to water.
During hot and dry periods, sweet potatoes may require more frequent watering to prevent wilting. A deep watering session once or twice a week is usually sufficient, allowing the water to penetrate deeply into the soil to reach the roots. To help retain moisture, consider using mulch around your sweet potato plants. Mulch can also help regulate soil temperature and suppress weed growth, creating a more favorable environment for your sweet potatoes to flourish.
Recommended If you require a high-quality water hose for garden watering, this one is worth considering.
Fertilizing Your Sweet Potatoes Throughout the Growing Season
When it comes to keeping your sweet potatoes happy and healthy throughout the growing season, regular fertilizing is key. These hearty plants thrive on a consistent supply of nutrients to fuel their growth and development. A balanced fertilizer with equal parts nitrogen, phosphorus, and potassium is ideal for sweet potatoes. You can apply the fertilizer around the base of the plants every 4-6 weeks during the growing season, being careful not to overdo it to avoid burning the roots.
In addition to a well-rounded fertilizer, organic matter such as compost or aged manure can also be beneficial for sweet potatoes. Adding a layer of organic material to the soil around the plants can help improve soil structure, retain moisture, and provide a slow release of nutrients as it decomposes. This natural approach can enhance the overall health of your sweet potato plants and contribute to a bountiful harvest at the end of the season.
Recommended If you’re in search of fertilizer, you can check out this selection.
Protecting Your Sweet Potatoes from Pests and Diseases
Once your sweet potatoes are growing nicely, you want to make sure those pesky pests and diseases don’t ruin all your hard work. One way to protect your sweet potatoes is by regularly inspecting the leaves for any signs of damage or infestation. Look out for holes, discoloration, or any strange markings that might indicate a problem.
Another effective way to keep your sweet potatoes safe is by planting other companion plants nearby that act as natural repellents for common pests. Plants like marigolds, basil, and rosemary are known to deter insects that could harm your sweet potatoes. Plus, they add a pop of color and some extra flavor to your garden!
Recommended Check out this amazing natural neem oil for insect control in plants!
Hilling Your Sweet Potatoes to Encourage Growth
Hilling your sweet potatoes is a crucial step in encouraging healthy growth and a bountiful harvest. This process involves gently mounding up soil around the base of the plants as they grow, providing additional support and room for the potatoes to develop underground. By hilling your sweet potatoes, you not only promote better root development but also protect the tubers from exposure to sunlight, which can cause them to turn green and become bitter.
To hill your sweet potatoes, simply use a hoe or garden shovel to mound up soil around the base of the plants, taking care not to damage the stems or roots. As the vines continue to grow throughout the season, you can continue to hill them periodically to provide ongoing support. This practice also helps to control weeds, improve drainage, and create a loose, aerated soil environment that is ideal for sweet potato growth. By hilling your sweet potatoes regularly, you are setting the stage for a successful harvest of delicious and nutritious tubers.
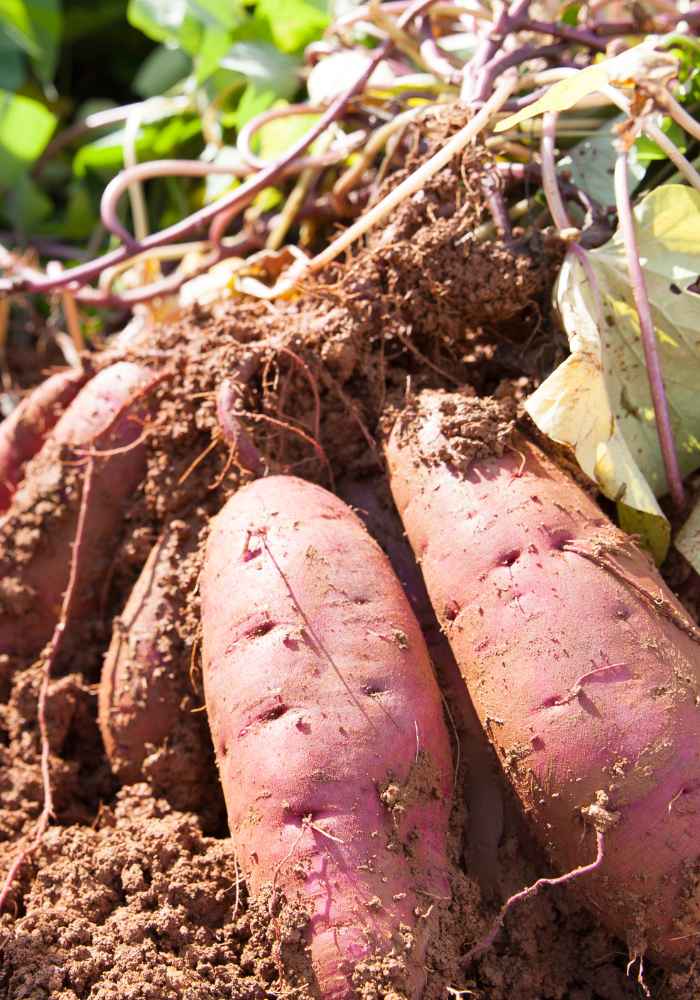
Harvesting Your Sweet Potatoes at the Right Time
Once your sweet potatoes have had ample time to grow and develop – typically around 90 to 170 days after planting – it’s time to start thinking about harvesting them. One of the signs that your sweet potatoes are ready for harvesting is when the vines start to fade and turn yellow, indicating that the tubers have reached maturity underground. If you’re unsure about the readiness of your sweet potatoes, gently digging around the base of the plant to unearth a few tubers can give you a good idea of their size and readiness.
When it comes to harvesting your sweet potatoes, be gentle and careful to avoid damaging the delicate skin of the tubers. Use a digging fork or your hands to carefully loosen the soil around the base of the plant before gently pulling up the tubers. Be sure to handle them with care as any cuts or bruises can lead to spoilage during storage. Once harvested, allow the sweet potatoes to cure in a warm, dry location for about 10-14 days to further develop their sweetness and to allow any minor cuts or bruises to heal.
Storing Your Sweet Potatoes for Long-Term Use
Once you’ve harvested your sweet potatoes and all the hard work has paid off, it’s time to think about how to store these tasty tubers for the long haul. Storing sweet potatoes properly can help retain their flavor and texture for months, ensuring you have a delicious supply on hand. To start, make sure you cure your sweet potatoes first. This process involves letting them sit in a warm, humid place for about 10 days. This helps toughen the skin and heal any minor cuts or bruises, prolonging their storage life.
After curing, it’s essential to find a cool, dark, and well-ventilated spot to store your sweet potatoes. Ideally, the temperature should be around 55-60°F (13-16°C). Avoid storing them in the refrigerator, as the cold temperature can negatively impact their flavor and texture. Instead, consider using a basement, cellar, or pantry that meets these conditions. Ensure there is good air circulation to prevent moisture build-up, which could lead to rot. By following these simple steps, you can enjoy your homegrown sweet potatoes well into the winter months.
Recommended check this heavy-duty plant support structure for Plant
Can I store sweet potatoes for long-term use?
Yes, you can store sweet potatoes for long-term use by following proper storage techniques.
How long can sweet potatoes be stored for?
Sweet potatoes can be stored for several months if stored properly in a cool, dark, and well-ventilated place.
What is the best way to store sweet potatoes?
The best way to store sweet potatoes for long-term use is to keep them in a cool (55-60°F), dark, and well-ventilated place, such as a basement or pantry.
Can I freeze sweet potatoes for long-term storage?
Yes, you can freeze sweet potatoes for long-term storage by blanching them first and then freezing in an airtight container.
How should I prepare sweet potatoes for storage?
Before storing sweet potatoes, make sure to cure them first by placing them in a warm, humid place for about 10-14 days. This will help them develop a thicker skin and improve their flavor for storage.
How can I tell if sweet potatoes have gone bad?
If sweet potatoes have started to sprout, develop mold, or have soft spots, they have gone bad and should not be consumed.